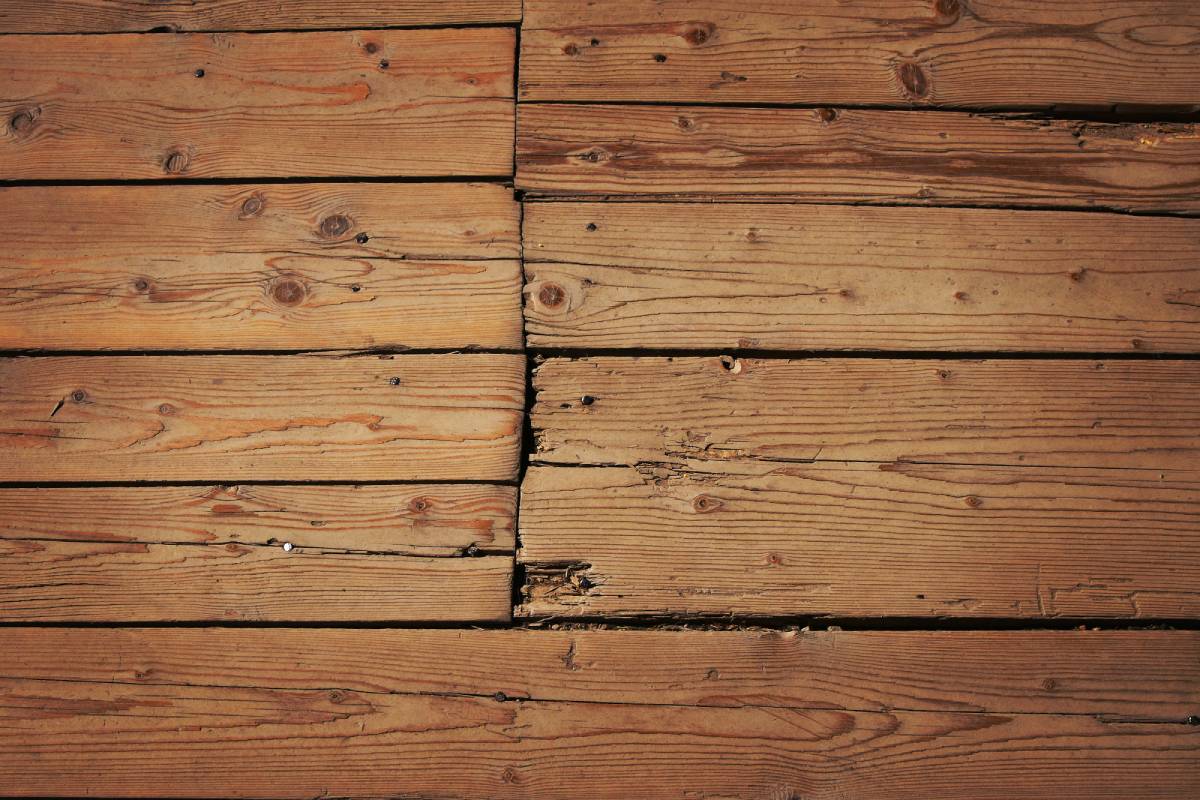
Timber floors are the crowning jewel of many homes. They offer warmth, character, and a timeless aesthetic that synthetic materials struggle to replicate. However, because timber is a natural material, it is susceptible to the wear and tear of daily life. From the screech of a moved chair to the accidental spill of a glass of wine, damage is inevitable.
If you are looking down at a gouge, a scratch, or a water stain and wondering if your floor is ruined, take a deep breath. In most cases, timber is incredibly forgiving. This comprehensive guide will walk you through exactly how to repair a damaged timber floor, restoring its glory without breaking the bank.
Table of Contents
- Assessing the Damage: Diagnosis Before Action
- Essential Tools and Materials
- The Quick Fix: Repairing Surface Scratches
- The Deep Fix: Filling Gouges and Dents
- The Hardest Hit: Fixing Water Damage and Stains
- Replacing a Severely Damaged Board
- Refinishing: The Final Step for Consistency
- Maintenance: Preventing Future Damage
1. Assessing the Damage: Diagnosis Before Action
Before you grab a sander, you must identify the severity of the issue. Not all damage requires a full restoration. Generally, timber floor damage falls into three categories:
- Surface Level: Scuffs in the finish (polyurethane or wax) that haven’t penetrated the wood fibers.
- Wood Level: Deep scratches, dents, or gouges that cut into the timber itself.
- Structural/Environmental: Cupping (edges higher than center), crowning (center higher than edges), or rotting caused by moisture.
Pro Tip: Pour a tablespoon of water over the scratch. If the water beads up, the finish is intact, and you only need a surface repair. If the water soaks in and darkens the wood, the seal is broken.
2. Essential Tools and Materials
Having the right gear is half the battle. Depending on the severity of your repair, you may need:
- For Cleaning: Mineral spirits and microfiber cloths are standard, but for ongoing care, avoid harsh chemical detergents that can strip your finish. Instead, opt for natural and healthy ways to keep your home clean and residue-free, ensuring your timber breathes and retains its shine without toxic buildup.
- For Filling: Wood putty (stainable), wax filler sticks.
- For Sanding: Sandpaper (varying grits: 120, 150, 220), sanding block, or an orbital sander.
- For Finishing: Matching wood stain, polyurethane or floor wax, paintbrush or lambswool applicator.
- Safety: Dust mask and safety goggles.

3. The Quick Fix: Repairing Surface Scratches
Light scratches are the most common issue, often caused by pets or shoes. Fortunately, they are also the easiest to fix.
The “Walnut” Trick (For very minor scuffs)
Believe it or not, the oil from a raw walnut can hide minor scratches. Rub the meat of the walnut diagonally across the scratch. The oil darkens the wood, camouflaging the mark.
The Wax Stick Method
- Clean the area: Ensure no dust or debris is in the scratch.
- Select a colour: Buy a wax stick that matches the darkest grain in your floor.
- Fill: Rub the stick over the scratch until it is filled.
- Buff: Use a soft cloth to buff away excess wax.
4. The Deep Fix: Filling Gouges and Dents
When a heavy object falls, it can leave a significant dent. Here is how to handle damage that penetrates the wood.
Using Wood Putty
- Prep the area: Lightly sand the edges of the gouge with fine-grit paper (180-grit) to remove splinters.
- Fill: Use a putty knife to press wood filler into the hole. Overfill it slightly, as the putty shrinks when it dries.
- Dry: Let it dry according to the manufacturer’s instructions (usually 2–4 hours).
- Sand: Sand the dried putty flush with the floor using 220-grit paper.
- Colour: Use a detailed brush to dab stain onto the putty to match the surrounding floor.
- Seal: Apply a small amount of polyurethane finish to seal the repair.
5. The Hardest Hit: Fixing Water Damage and Stains
Water is the enemy of timber. If you catch a spill immediately, you are safe. If water sits, it causes dark stains or warping.
Removing Dark Water Stains
Dark stains usually indicate mold or mineral reaction deep in the grain.
- Strip the finish: Sand the finish off the stained area.
- Apply Oxalic Acid: This is a wood bleach. Mix crystals with hot water and apply to the stain.
- Wait and Rinse: Let it sit until the stain lightens, then neutralize the acid with a baking soda and water mixture.
- Refinish: Sand smooth, stain, and seal.
Addressing “Cupping”
If your floorboards look like waves, they have absorbed moisture from the subfloor or high humidity.
- The Fix: You cannot sand cupped floors immediately. You must dry out the environment first using dehumidifiers and fans. Once the moisture content normalizes, the boards may flatten out. If they remain warped after drying, then you can sand them flat.

6. Replacing a Severely Damaged Board
Sometimes, a board is split or rotted beyond repair. Replacing a single board is a surgical procedure.
- Mark the Board: Use tape to mark the board you want to remove to avoid cutting into good timber.
- Cut: Use a circular saw to make two parallel cuts down the length of the board, stopping an inch from the ends.
- Extract: Chisel out the center piece, then carefully pry out the remaining edges.
- Prep the New Board: You will likely need to cut off the bottom groove of the new board so it can drop into place.
- Install: Apply floor adhesive to the subfloor, fit the new board in, and weigh it down until the glue sets.
7. Refinishing: The Final Step for Consistency
If you have performed multiple patch repairs, the repaired spots might look shinier or duller than the rest of the floor. This is where “screening” comes in.
You do not always need to sand down to the bare wood. “Screening” involves using a floor buffer with a sanding screen to take off just the top layer of polyurethane. Once scuffed, you can apply a fresh coat of finish over the entire room. This blends all your repairs into a seamless, unified surface.
8. Maintenance: Preventing Future Damage
The best repair strategy is prevention. To keep your timber floors looking pristine for decades:
- pads on Furniture: Every chair and table leg should have felt pads.
- Climate Control: Timber expands and contracts. Keep your home between 35% and 55% humidity to prevent gaps and cupping.
- Rug Placement: Place rugs in high-traffic areas and near entrances to catch grit before it scratches the floor.
- No High Heels: Stiletto heels exert a pressure per square inch higher than an elephant’s foot, easily denting softer woods like Pine.
Conclusion
A damaged timber floor is not a disaster; it is a project. Whether you are buffing out a minor scratch or replacing a plank, the warmth and value that timber adds to your home are worth the effort of restoration. By following these steps on how to repair a damaged timber floor, you are not just fixing a surface; you are preserving the character of your home for years to come.However, if the project feels out of your depth, or if you are dealing with heritage timber that requires specialized care, it is often safer to call in a professional. Experts like Heritage Restorations and Renovations can handle delicate structural repairs and sanding that go beyond the scope of a weekend DIY project, ensuring your floor remains a centerpiece of your home.